It’s no secret that I like to use Azure virtual machines for my lab testing. In fact, as much as I love it, it’s rare that I even use Hyper-V on my local machine anymore. From servers to client OS’s, Azure virtual machine images stand ready to provide the infrastructure for me to do almost all of my lab testing, but every now and then I need a little more. For example, once upon a time I needed to do some Windows Information Protection (WIP) testing to prep for a conference demo, but all the Windows 10 images in Azure at the time were Windows 10 version 1511—which isn’t supported for WIP. Despair.
Luckily for us, Azure makes it easy to upload your own virtual machine images. However, like most simple things, it’s not always easy to do. So, here’s how to do it.
Note: Windows 10 1607 is now available in the Azure VM gallery. So, if you’re reading this blog to get that version of Windows uploaded just go create a new VM from the gallery. And my job here is done.
Before you (can) get started
You’ll need to meet some basic prerequisites before you can upload a VM to Azure. Honestly, configuring the prerequisites is most likely the place where you’ll run into issues, but I can’t provide tech support here so I’ll just do my best to point you in the right directions to keep you out of trouble:
- Windows 10 .ISO file to create a VM. I can’t help you much with this, but I can tell you that I got mine through an MSDN subscription.
- Hyper-V to create the virtual machine image file to upload. I’m using the Hyper-V features installed on a Windows 10 laptop. No need for a server here.
- Azure AD subscription. Self-explanatory. If you’re trying to upload a VM to Azure then I’m guessing you already have one of these. If not, grab a trial. Save yourself some time and just get the entire Enterprise Mobility + Security trial. Then you’ll have other toys to play with and be able to really put your Win10 image through its paces when we’re done here.
- Azure AD cmdlets and connect PowerShell to your Azure AD service. You can see how to do all that here: https://msdn.microsoft.com/library/azure/jj151815(v=azure.98).aspx#bkmk_installmodule. If you just want to grab the Azure AD cmdlets, you can do that from here: http://connect.microsoft.com/site1164/Downloads/DownloadDetails.aspx?DownloadID=59185. Make sure you can access your Azure AD subscription using Azure PowerShell CmdLets (its Management certificate must be installed on your local machine and azure subscription should be set using set-azuresubscription).
- Azure blob storage container configured to receive the VM image you’re trying to upload. Sounds scary, but it’s pretty easy to do. Just do this to create a storage account and blob container (ignore the SQL parts and pieces, you don’t need those for this): https://msdn.microsoft.com/library/dn466439(v=sql.120).aspx. Make sure your Azure storage account is in the same subscription and region as the future VM(s).
Create the VM
Time to get to work. Create a virtual machine in Hyper-V just like you always do except:
- Do not connect it to the internet while customizing the VM. Windows 10 connects to the internet and starts running system updates and app installs when setup starts up. You don’t want that to happen while prepping the image.
- Make the hard drive file a .VHD and not a .VHDX. VHDX files are not supported in Azure.
- Try to keep the VM small, but not too small. You’ll be uploading this VM to Azure so unless you just like to watch the upload script run for a very long time, try to keep the .VHD as small as possible.
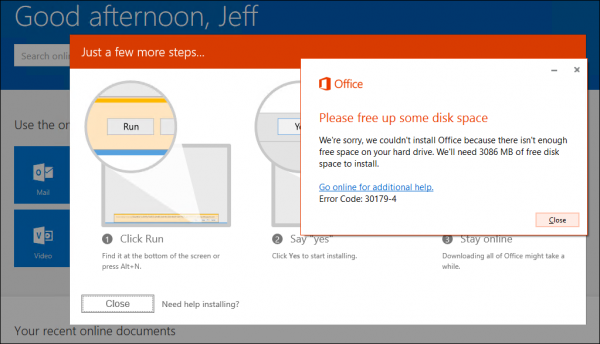
Pro tip: Office 365 requires at least 3GB of free disk space to install. And it also turns out that 9GB is too small for both Windows 10 and Office 365…says the guy who uploaded a 9GB VHD. Argh. I’d recommend going for a minimum of at least 10GB for a standard Win10 machine and at least 15GB if you’ll use Office 365 too. You don’t need to upload a 120GB+ VHD file, but you also don’t want be this guy at the end of all this (*&$*#&!):
Prepare the VM (aka sysprep)
Now that you have a functioning Windows 10 VM running in Hyper-V, you can customize it to your heart’s content. Feel free to add files that you want present on all VMs you create in Azure and do whatever other settings customizations you feel compelled to do. When you’re finished, you need to use our old friend sysprep.exe to generalize the image so that it can be uploaded.
It’s easy to do, just run this command when you’re ready to close shop on customizing the image:
C:\Windows\system32\sysprep\sysprep.exe /generalize /oobe /shutdown
Sysprep will do its thing and shut down the VM. Don’t start the VM again as it’s now ready to be uploaded to Azure. Too easy right?
Get to work with PowerShell
As previously mentioned, you’ll need to meet the Azure PowerShell prerequisites so we’ll just assume you now have the Azure AD cmdlets installed and you’ve connected successfully to your Azure subscription. All that is left do now is to run two cmdlets and wait a while for the upload to finish. There are two things you’ll need to know before running the script though: where your .VHD file is and the URL to your storage container.
- By default the .VHD will probably be somewhere like C:\Users\Public\Documents\Hyper-V\Virtual hard disks\<name of your VHD>. I usually copy that file to somewhere easier to find and also to be sure that I maintain a backup of the sysprepped image.
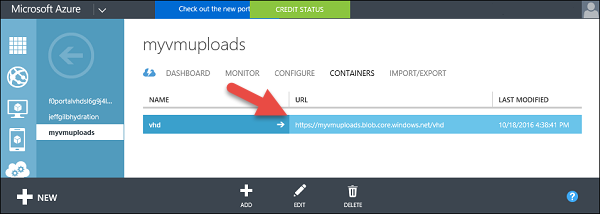
- The url to your storage container…you did create one earlier while addressing the prereqs right?…is easy to figure out. Just log into Azure and navigate to the storage account and blob container that you want the VM to eventually end up in. Now, just copy the URL:
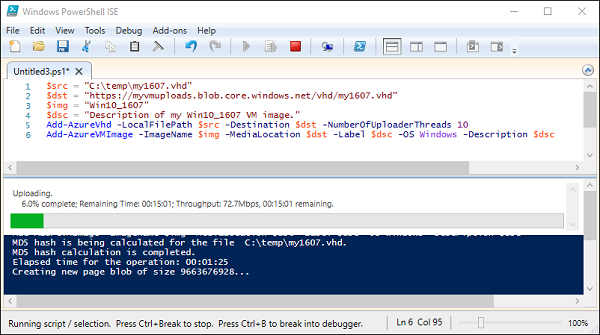
Armed with these two pieces of information, you’re now ready to run the PowerShell cmdlets to upload your custom VM to Azure (Add-AzureVhd) and create a custom image to use when creating an Azure VM (Add-AsureVMImage). Open up PowerShell ISE and run these commands:
$src = <path to your .VHD>
$dst = <path to your blob storage container>/<.VHD file name>
$img = <image name you want to use>
$dsc = <description for the image you are uploading>
Add-AzureVhd -LocalFilePath $src -Destination $dst -NumberOfUploaderThreads 10
Add-AzureVMImage -ImageName $img -MediaLocation $dst -Label $dsc -OS Windows -Description $dsc
It should look something like this when you run the script:
Now just sit back to enjoy the show. Actually, now would be a good time to go grab a coffee and a snack. It’s going to be a while. Go ahead, take an early lunch, you deserve it anyway.
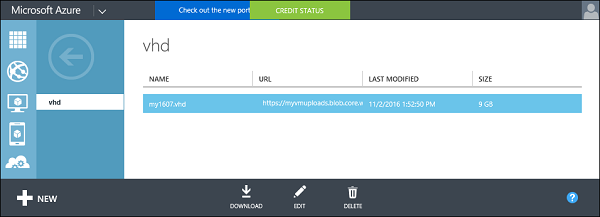
OK, back to work. With the script finished doing its thing you can close PowerShell ISE and go check that your VM image VHD has been successfully uploaded to Azure storage like so:
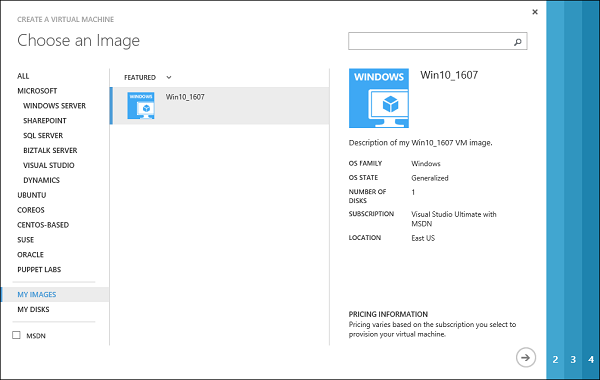
Create a new Azure VM
All that’s left to do now is to create a VM like you always do in Azure—with one exception. When creating the VM, you will need to select an operating system from your “MY IMAGES” list, which should now contain your custom VHD image. Tada!
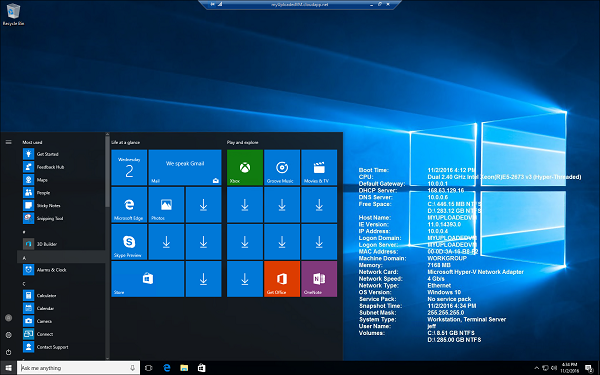
Create the VM, log in and you might notice the VM completing Start Menu app installations and finishing setup. Done:
Where do you go from here?
Luckily (for you, not me who just discovered this as I was wrapping up the blog post!), Cynthia has done a great job documenting this process here: https://azure.microsoft.com/documentation/articles/virtual-machines-windows-classic-createupload-vhd/ so there’s another reference for you if you get stuck.
I’ve blogged this process in the hopes that the information will help you to upload your own custom VM images to Azure, but unfortunately I can’t scale to provide tech support for everyone who reads this. So, I hope this information helps you, but use at your own risk, your mileage may vary, etc. etc. etc.
You’ve seen my blog; want to follow me on Twitter too? @JeffGilb.
![]()